prometheus_0">部署prometheus
1. 环境
| 主机 | IP |
|---|---|
| 监控机 | 192.168.72.141 |
| 被监控机 | 192.168.72.139 |
2. 部署
2.1 安装go环境
[root@master prometheus]# dnf -y install go
上次元数据过期检查:4:22:23 前,执行于 2021年11月24日 星期三 21时00分43秒。
依赖关系解决。
============================================
 软件包     架构   版本     仓库       大小
============================================
安装:
 golang     x86_64 1.17.2-2.module_el8.6.0+9

[root@master local]# go version
go version go1.17.2 linux/amd64
prometheus_23">2.2安装prometheus
prometheus-2.31.1.linux-amd64.tar.gz
2.2.1 安装
[root@master src]# ls
apr-1.7.0
apr-1.7.0.tar.gz
apr-util-1.6.1
apr-util-1.6.1.tar.gz
debug
httpd-2.4.49
httpd-2.4.49.tar.gz
kernels
prometheus-2.31.1.linux-amd64.tar.gz
[root@master src]# tar xf prometheus-2.31.1.linux-amd64.tar.gz -C /usr/local/
[root@master src]# cd /usr/local/
[root@master local]# ls
apache    lib
apr       lib64
apr+      libexec
apr-util  prometheus-2.31.1.linux-amd64
bin       sbin
etc       share
games     src
include
[root@master local]# mv prometheus-2.31.1.linux-amd64/ prometheus
[root@master local]# ls
apache    bin      lib         sbin
apr       etc      lib64       share
apr+      games    libexec     src
apr-util  include  prometheus
2.2.2 启动
[root@master prometheus]# ./prometheus --config.file=/usr/local/prometheus/prometheus.yml &
2.2.3 验证

2.2.4 以服务的方式启动
[root@master prometheus]# cat /etc/systemd/system/prometheus.service
[Unit]
Description=Prometheus Monitoring System
Documentation=Prometheus Monitoring System

[Service]
ExecStart=/usr/local/prometheus/prometheus \
  --config.file=/usr/local/prometheus/prometheus.yml \
  --web.listen-address=:9090
Restart=on-failure
[Install]
WantedBy=multi-user.target

[root@master prometheus]# systemctl enable --now prometheus
Created symlink /etc/systemd/system/multi-user.target.wants/prometheus.service → /etc/systemd/system/prometheus.service.

[root@master prometheus]# ss -antl
State   Recv-Q  Send-Q   Local Address:Port        Peer Address:Port      Process
LISTEN  0       128            0.0.0.0:22               0.0.0.0:*
LISTEN  0       128            0.0.0.0:4505             0.0.0.0:*
LISTEN  0       128            0.0.0.0:4506             0.0.0.0:*
LISTEN  0       128                  *:9090                   *:*
LISTEN  0       128                  *:80                     *:*
LISTEN  0       128               [::]:22                  [::]:*
2.3 在被控机上安装 node-exporter
node_exporter-1.3.0.linux-amd64.tar.gz
2.3.1安装
[root@node1 ~]# cd /usr/src/
[root@node1 src]# ls
debug
haproxy-2.5.0
kernels
mysql-5.7.35-linux-glibc2.12-x86_64.tar.gz
redis-6.2.6
[root@node1 src]# ls
debug
haproxy-2.5.0
kernels
mysql-5.7.35-linux-glibc2.12-x86_64.tar.gz
node_exporter-1.3.0.linux-amd64.tar.gz
redis-6.2.6
[root@node1 src]# tar xf node_exporter-1.3.0.linux-amd64.tar.gz -C /usr/local/
[root@node1 local]# mv node_exporter-1.3.0.linux-amd64/ node_exporter
[root@node1 local]# ls
bin  games    include  lib64    mysql                                node_exporter  sbin   src
etc  haproxy  lib      libexec  mysql-5.7.35-linux-glibc2.12-x86_64  redis          share

[root@node1 local]# cd node_exporter/
[root@node1 node_exporter]# ./node_exporter
ts=2021-11-25T07:00:26.673Z caller=node_exporter.go:182 level=info msg="Starting node_exporter" version="(version=1.3.0, branch=HEAD, revision=c65f870ef90a4088210af0319498b832360c3366)"
ts=2021-11-25T07:00:26.673Z caller=node_exporter.go:183 level=info msg="Build context" b
2.3.2验证
访问192.168.72.139:9100/metrics,若出现数据则服务开启成功

2.3.4设置node_exporter 以服务的方式启动并设置开机自启
[root@node1 node_exporter]# vim /etc/systemd/system/node_exporter.service
[root@node1 node_exporter]# cat /etc/systemd/system/node_exporter.service
[Unit]
Description=node_exporter
After=network.target

[Service]
ExecStart=/usr/local/node_exporter/node_exporter
Restart=on-failure

[Install]
WantedBy=multi-user.target
[root@node1 node_exporter]# systemctl daemon-reload
[root@node1 node_exporter]# systemctl enable --now node_exporter
Created symlink /etc/systemd/system/multi-user.target.wants/node_exporter.service → /etc/systemd/system/node_exporter.service.
[root@node1 node_exporter]# systemctl status node_exporter
● node_exporter.service - node_exporter
   Loaded: loaded (/etc/systemd/system/node>
   Active: active (running) since Thu 2021->
 Main PID: 23749 (node_exporter)
    Tasks: 5 (limit: 11201)
   Memory: 6.9M
   CGroup: /system.slice/node_exporter.serv>
           └─23749 /usr/local/node_exporter>

11月 25 02:05:20 node1 node_exporter[23749]>
11月 25 02:05:20 node1 node_exporter[23749]>
11月 25 02:05:20 node1 node_exporter[23749]>
11月 25 02:05:20 node1 node_exporter[23749]>
11月 25 02:05:20 node1 node_exporter[23749]>
11月 25 02:05:20 node1 node_exporter[23749]>
11月 25 02:05:20 node1 node_exporter[23749]>


[root@node1 node_exporter]# ss -antl
State  Recv-Q  Send-Q   Local Address:Port         Peer Address:Port      Process
LISTEN 0       5            127.0.0.1:25151             0.0.0.0:*
LISTEN 0       25             0.0.0.0:514               0.0.0.0:*
LISTEN 0       128            0.0.0.0:6379              0.0.0.0:*
LISTEN 0       128            0.0.0.0:22                0.0.0.0:*
LISTEN 0       128                  *:443                     *:*
LISTEN 0       25                [::]:514                  [::]:*
LISTEN 0       80                   *:3306                    *:*
LISTEN 0       128                  *:9100                    *:*
LISTEN 0       128                  *:80                      *:*
LISTEN 0       128               [::]:22                   [::]:*
2.4 修改Prometheus 配置,监控Linux机器
2.4.1修改Prometheus配置
进入Prometheus的安装文件夹,打开Prometheus配置文件
[root@master prometheus]# pwd
/usr/local/prometheus
[root@master prometheus]# ls
console_libraries  NOTICE
consoles           prometheus
data               prometheus.yml
LICENSE            promtool
[root@master prometheus]# vim prometheus.yml
在scrape_configs标签下,添加以下内容,配置监控
  - job_name: 'Linux'
    static_configs:
      - targets: ['192.168.72.139:9100']
        labels:
          instance: Linux
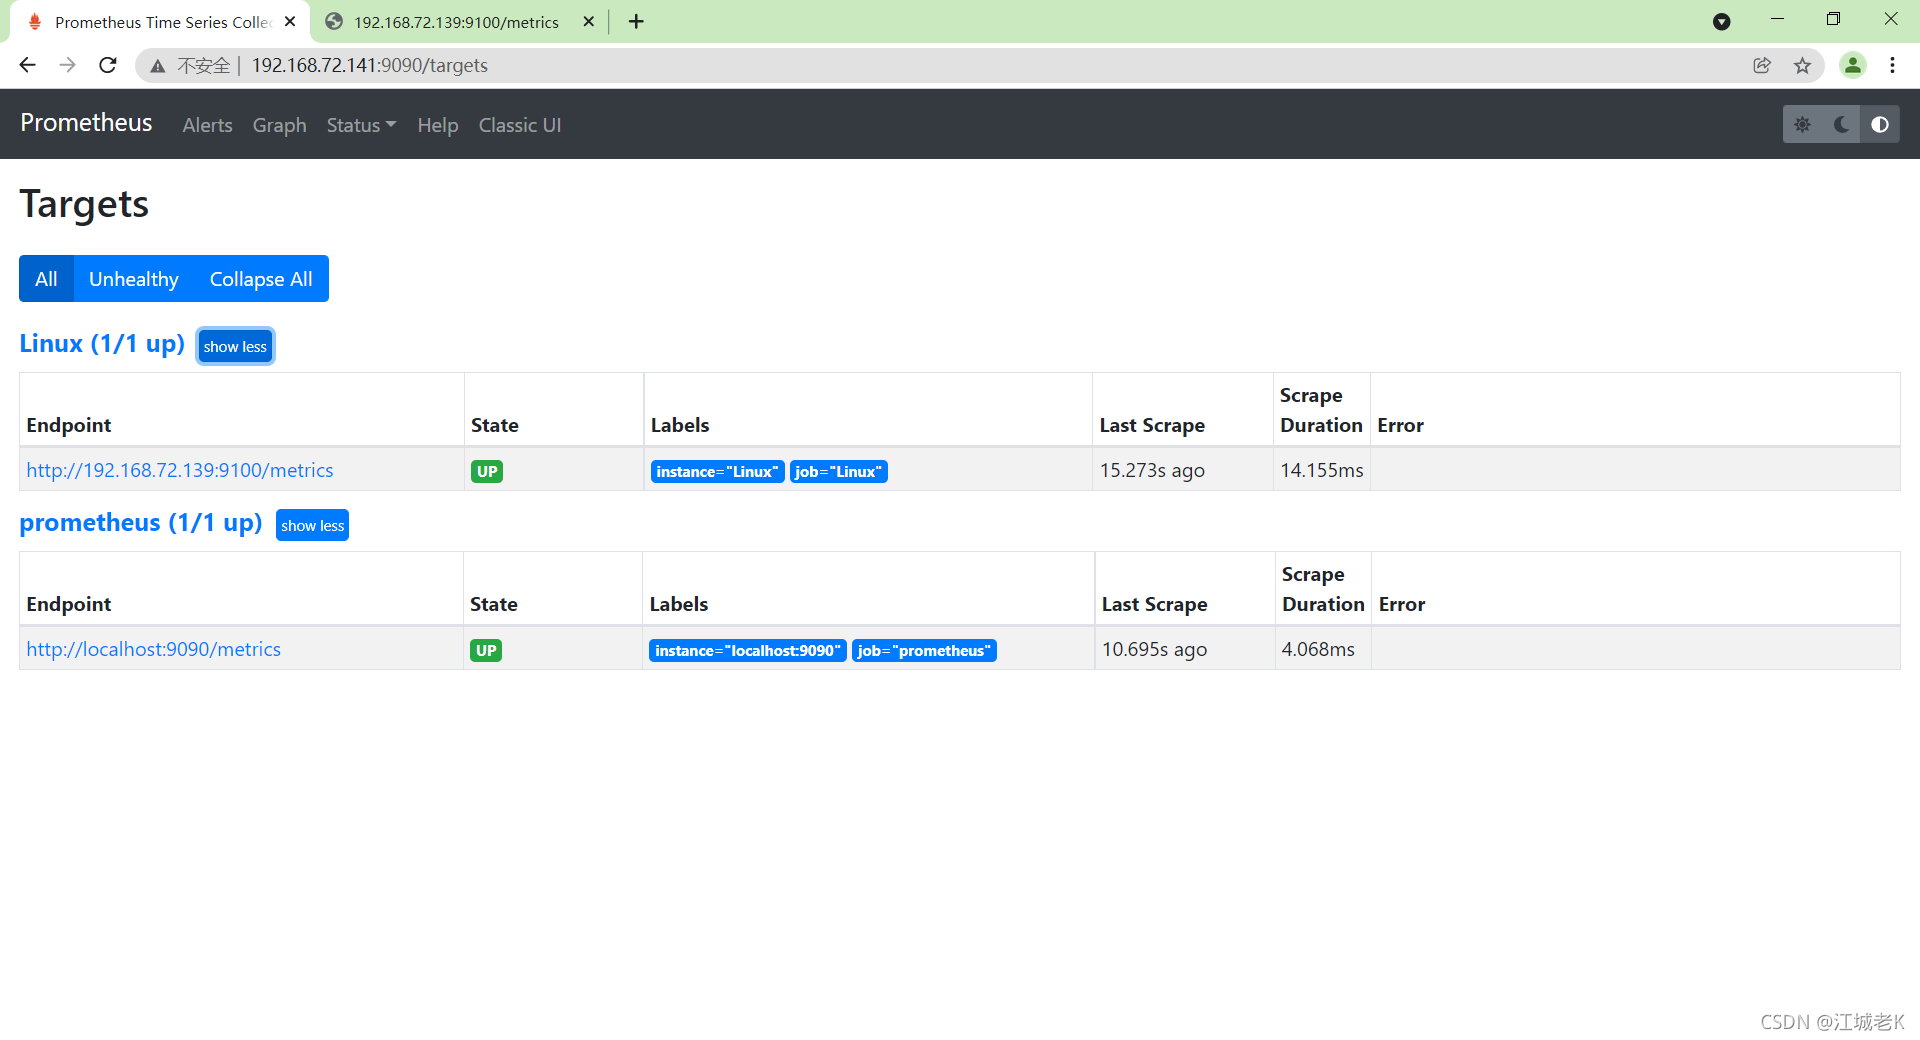
2.4.2重启访问
[root@master prometheus]# systemctl restart prometheus